

We must know how to clean a meat grinder properly. Any appliance that we use for processing food especially raw ones may be breeding grounds for bacteria and germs if we are not careful enough.
And your cleaning process should not only be about water and soap, but it is not also about how often you do it. We must employ techniques to make sure that our food is always prepared healthily and cleanly. After all, we only want what’s best for the family.
How to clean a meat grinder
Step 1: Get rid of grease

The first thing you have to practice is cleaning your meat grinders immediately after every use. You must already be aware that since you’re grinding raw meat then your grinder is always going to be filled with grease from all that processed fats.
Now at this point, you won’t be able to get rid of all that grease but at least remove a significant amount of it and right away. A perfect way to do so is by using — bread. Use a couple of slices of bread as a makeshift sponge for all those oils, fats, and grease.
Before disassembling your meat grinder, make sure to drop and grind those two slices of bread into it for a thorough grease removal process. This should cut down a significant amount of clean time later on.
Step 2: Soak
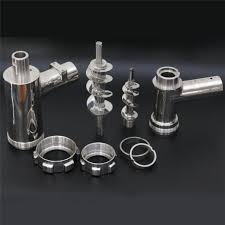
Next up is to disassemble your meat grinder and get it ready for the soaking process. If you are not sure how to do so then make sure to have your manual on hand for the disassembling process.
You mustn’t lose any of the parts, take pictures of the step-by-step disassembling should you need a visual reference later on. Blades, cover, feeding tube, plates, and screws should all be accounted for.
Take it all apart carefully and try not to cut yourself as you’re dealing with sharp blades and plates. Then soak it all up.
Fill a bucket large enough to accommodate the parts and fill it with warm water. Mix in your trusted detergent, whatever you use for your dishes, and soak all the parts of your meat grinder into your mini-concoction.
Make sure to soak it in for a few minutes and remember that if you have an electric meat grinder, then you don’t soak the motorized parts.
Step 3: Wash
Now that all the parts of your meat grinder have been soaked in warm water and detergent for a good amount of time, then it is time to wash them all up. Again, be careful with the sharp components like your blades, and plates.
Use the appropriate cleaning material to thoroughly and attentively clean the parts especially those with hard-to-reach areas. Most importantly, don’t rush the washing process and be thorough.
Use a sponge first to clean the screws, covers, and blades. When it comes to the internals of your feeding tube, hoppers, and plate holes then an efficient way to do it is by using a bottle brush. After you’ve thoroughly brushed all the parts then rinse them with clean water.
Remember to brush extra in this part of the process, remember that if you leave just tiny debris on your meat grinder that it can be a breeding ground for bacteria and all sorts of germs. Then this whole process would be quite useless. You don’t want any of the members of the household to get sick just because of careless cleaning.
Once you’ve scrub enough, then it’s time to proceed to our last step.
Step 4: Dry properly
The last thing you got to do is to make sure to dry all parts properly. Don’t be in a hurry to put all the pieces back together just yet. You need to make sure that each component that you just thoroughly washed is dried up completely.
As you may know, moisture is once again a favorite spot for germs and bacteria to grow on. The best thing for you to do is to put the parts into a wire rack and let them dry out properly. A fresh towel may also be utilized to dry all the parts.
Bacteria and germs aren’t your only concern with your meat grinder but also rust as well as oxidation. When your meat grinder isn’t dried out properly then you put it at risk of corrosion which is not good for food processing devices.
Of course, after the parts have dried out, reassemble them again for use. Grind, clean, rinse, repeat!
Bonus TIPS!
In very few simple steps you now know how to clean a meat grinder. Take note, that you’re not just cleaning it but also preserving it so you can get the most out of its service life-wise.
Whether you are using a manual or electric type grinder it pays to take care of your appliances just so you can save some cash that instead would’ve been used to buy new ones if they prematurely stop working.
I don’t about you but I can’t live without my handy meat grinder. It assists me almost every day with my cooking as I prefer to process meat myself and not buy readymade ones from the meat shop.
Having said all of that, here are some more practical tips on how to preserve the life of your meat grinder.
- To prevent clogging on your meat grinder it is advisable to remove all excess fats and sinew from your meat before you process them.
- We also know how tastier the meat is when you grind it together with some bones. Especially if we are preparing the meals of our beloved pets. But as much as possible, especially when you’re using a manually operated grinder then it is not recommended that you grind bones with it. Make sure to remove the bones large and small to prevent clogging.
- Bones will also oftentimes cause damage to your blades and cutting plates or at the very least dull them out.
- The best way to keep your grinder not accumulating rust when in storage is to keep it lubricated. Make sure to use food-grade mineral oil and fill a spray bottle with it. All you have to do is to mist all of your grinder’s metal parts evenly. Make sure to not spray on any of the electrical parts or the motor.
- When spraying your meat grinder with oil, then make sure to pay extra attention to the screws and pusher as they are the parts that come in contact with the meat most.
- Another storage trick for your meat grinder should you not use it often is to store it on sealable bags with rice. Rice is well known to absorb moisture and if you separate the parts of your meat grinder and put them in the bags with rice then they won’t accumulate rust no matter for how long.
- Lastly, you may store any non-electric parts of your grinder in your freezers. They work best when cold and in doing so you also get to keep the integrity of your meat grinders.
- Also, sterilize oiled parts using bleach before you use your grinder again.
Learned a lot from the tips and tricks we shared? We enjoyed preparing it too. Once again, stay safe and stay healthy!